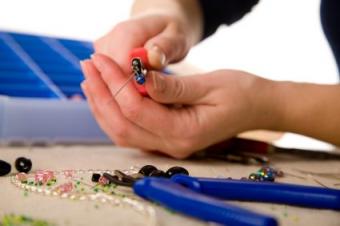
If you're new to beading, you'll probably want to start out with a simple project that will give you confidence working with the tools and techniques. Choosing a project that is too difficult is likely to cause unneeded frustration.
Basic Beading with Stretch Cord

Beading with stretch cord is the easiest way to begin making handmade jewelry. Once you've mastered this method, you can graduate to making projects with beading wire and clasps.
To begin beading, you might want to start with a stretch cord bracelet. This type of project is very easy to make because it requires no clasp.
- Cut a piece of stretch cord measuring about nine inches.
- String beads in the desired pattern until your bracelet measures between seven and eight inches in length.
- Tie a knot in the cord.
- Secure the knot with a dab of clear fingernail polish.
- Use scissors to trim the excess cord.
The Beaded Bracelet on Stretch Cord tutorial shows this process in greater detail.
Using Beading Wire and Clasps

Once you've mastered creating simple jewelry with stretch cord, you can graduate to making a necklace using beading wire and a clasp. You can find all sorts of closures at your local craft store, from basic hooks and eyes to lobster clasps, S-hooks, pieces that screw together, and those round closures where you have to thread one side through the other. Use whatever you think will look nice with your beads.
- Drape the wire around your neck. Decide how long you would like it to be, then add a couple inches to each side for good measure. If you're making the necklace as a gift, remember that most people like necklaces between 16 and 18 inches in length.
- Before you string any beads, you will want to secure one of your closures to the end of your wire. To do this, simply slide the closure onto the wire, fold over an inch or two and loop the wire around the hole in the closure one or two times to secure.
- Crimp beads give a nice finished look to a piece. They look like regular spacer beads, and you can usually find them in gold or silver to match whatever closure you are using on your piece. Crimp beads hold the wire snugly in place so the beads won't shift around on the wire as much. If you're planning to use a crimp bead, slide one on now. Make sure that it's as close to the closure as possible and that both layers of the wire are going through it. Use your crimping pliers to smoosh the bead down flat against the wire.
- String your beads on in whatever manner you desire. You can buy beading needles, but especially with large beads its just as easy to string the beads using the wire as your needle. Use spacers if you like.
- When you get within a couple inches of the end of the wire, slide on a crimp bead, if you're using one, then slide the other end of your closure onto the wire, wrapping it a couple of times and sliding the end back down under the crimp bead and the first couple of beads.
- Pull tight and trim any excess wire. Crimp your bead, if you're using one.
The Beaded Antique Key Necklace tutorial illustrates the process of making a beaded necklace with this method in greater detail.
Simple Stitching Techniques for Beads
Often, stitches are used to link beads or to apply them to a surface such as fabric. Some of the common beading techniques for stitched beads include:
- Daisy chain: The daisy chain is used to create a row of beads that resembles a chain of flowers. Sometimes, a larger bead is used in the center of the stitch to create a more elaborate effect.
- Peyote stitch: The peyote stitch has several variations, including flat, even, and odd-count as well as zipping up or joining flat peyote.
- Brick stitch: The brick stitch one of the most versatile beading techniques, since it can be used to make dangling earrings as well as beaded fringe.
- Twill stitch: Once you've mastered the twill stitch, you'll be well on your way to creating anklets, chokers, belts, and bracelets in almost any design you can imagine. The twill stitch can be also be used to create beaded wall hangings or other home décor projects.
Remember to Have Fun!
When you're beading, don't worry about doing it right or wrong. There is no right or wrong when it comes to making handmade jewelry! Be creative, do what moves you, and enjoy your beautiful project.


