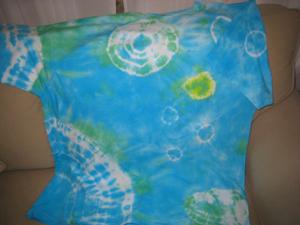
Our free tie dye instruction can get you started decorating your own shirts with simple dying techniques. While there are many books and DVDs available to teach you to tie dye, you can easily get started and create fun patterns without much time or investment.
What Do You Want to Dye?
While the most classic of tie dye projects is the t-shirt, you can apply the tie dye technique to many other fabric goods. Consider tie dying socks, a jacket, tote bags or anything else that comes in a white or natural solid fiber. The best fabrics for tie dying are 100% natural; we recommend white cotton goods, although silks and rayons can also be tie dyed.
Tie Dye Supplies
Before you get started tie dying, you will need to gather the right supplies. Some "tie dye kits" have many of these items included, but you can easily purchase them all separately.

- Cold Water Dye: For best results, choose dyes labeled "cold water" dye. These are designed to have clear, vibrant colors that do not need heat to set them into the fabric. Some of the dyes on the market that work well for tie dye include: Rainbow Rock, Tulip Cold Water Dye and Procion dye. Rit dye is not recommended for the tie dye process described in these instructions.
- Soda ash: This is sold near the dyes in most craft stores.
- Squeeze bottles: Depending on the dye you select, it may come with squeeze bottles for dye application. If not, you should purchase some inexpensive ones.
- Rubber bands: You will need quite a few rubber bands; you can get a large assortment of sizes inexpensively at office supply stores.
- Rubber or medical gloves: Unless you want really colorful hands for a few days, we recommend wearing gloves for this project
- Bucket: You will need a bucket to soak your shirts in a soda ash/water solution.
- Disposable table cover: Cover your work surface with a disposable plastic or vinyl table cover. When you're done, roll it up and throw it away.
Basic and Free Tie Dye Instructions for Shirts
When you tie dye, you use rubber bands to prevent the dye from touching portions of the item you are dying; the parts of your shirt that are wrapped will be left white.
So, the first step is to apply rubber bands to your shirt. One classic technique is to scrunch small portions of the shirt, then to gather them with tightly wrapped rubber bands. Try circles of different sizes, wrapping the rubber bands to make concentric circles and make different groupings. You can make any combination of these in order to make a fun, free-form tie dye pattern.
You can also twist and wrap your fabric to make stripes, spirals, hearts and other tie dye patterns.

Striped Dye Technique
Want to make a striped dye pattern? Carefully pleat your fabric into long, straight accordion folds. Hold your pleats in place by securing them at intervals with tightly wrapped rubber bands.
Soak Your Shirts
Once your rubber bands are all wrapped on your shirt in your desired pattern or patterns, mix the soda ash with water in your bucket. Submerge your shirt or shirts in the soda ash solution in the bucket and allow it to soak for 20 minutes. The soda ash will help the dye to adhere to the fabric.
Dying to Dye

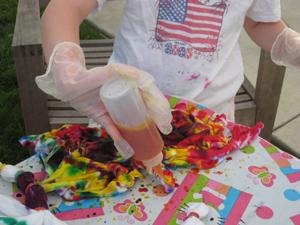
Once your shirt has soaked in the soda ash, remove it (make sure to wear gloves) and squeeze out the excess liquid. Place your shirt on your work surface and select your first dye color. Using the squeeze bottle, gently apply dye to the shirt. You can apply as many colors as you like, but keep in mind that they will mix and bleed into one another when they are adjacent. The more dye you use, the more solidly colored your shirt will be. Make sure to turn your shirt over so you can apply dye to both sides.
And then…
Once your dye application is complete, put your finished shirt in a plastic bag with a zipper closure. Allow the shirt to sit for 4-6 hours; this helps the dye to set and makes for a bolder, brighter shirt.
Once the appropriate time has elapsed, remove your shirt from the bag and place it in the sink. Run water over it to remove the excess dye until the water runs clear (or almost clear).
After the shirt has been thoroughly rinsed, remove the rubber bands. If you are impatient, carefully use scissors to cut them off.
Finally, wash your shirt in the washing machine. Make sure to wash it alone (or with similarly colored tie-dyed items). It is also a good idea to run an empty load or something non-critical (such as a load of rags or old play clothes) after you have washed your tie dyed shirt.
Enjoy!
 |
 |
 |
 |
 |
 |
.


