Needle Felted Bird

Choose Roving Colors

Assemble Your Tools

Begin Using the Needle

Form the Bird Body

Add Wings, Beak, and Eyes

© 2024 LoveToKnow Media. All rights reserved.

You may have used needle felting to embellish knitted items, but did you know that you can make three-dimensional animals like a needle felted bird? All you need are a few supplies and some time to experiment!

This project is for a bluebird, but you can make any kind of bird you have in mind. Simply adjust the colors of roving to reflect the bird's plumage.
To make a bluebird, choose blue, pink, yellow, and black wool roving. Form the blue roving into a rough bird shape as shown.

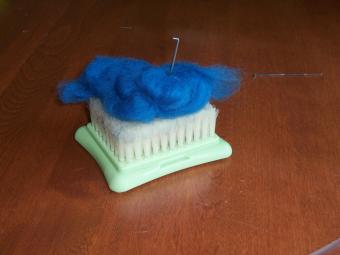
You'll also need some needle felting tools. This project is easier if you have a felting brush or mat, since you'll need to turn the felt object often. You'll also need a single felting needle. While using a single needle can be a bit slower than a multi-needle tool, it allows you to better control the shape of the bird.

Place the blue roving on your felting brush and begin pushing the needle in and out of the fiber. The barbs on the felting needle will catch on the fibers, causing them to interlock. Work around the edge of the bird to create the right shape, tucking loose fibers in as you go. Use your hands to loosen the fibers if you need to start over on a section.

When you've felted one side of the bird, turn it over. This lets you create a three-dimensional object. Do both sides of the bird body until they are the right texture. Don't forget to work the top of the head, the back, the tail, and the stomach. When you're done with the body, it's time to create the wings.

Use the same method to create each wing separately. With each wing, work one side of the roving and then the other, shaping the wing as you go. When you're happy with the wings, attach them to the bird body using your needle. Add more roving as needed to create the appropriate shape.
Use pink roving to create the bird's chest. Add the pink a little at a time until it looks right to you. Finally, add a beak and eyes. When you use a single needle, you'll find it's easy to do detail work.
Need a needle felting refresher? Be sure to sharpen your skills by reviewing How to Needle Felt.